
Taylor C712 Error Codes
& Troubleshooting Guide
Every fault message your C712 can display — BEATER OVERLOAD, HPCO COMPRESSOR, thermistor failures, temperature lockouts — explained with operator fix steps and genuine Taylor OEM parts linked directly to our store.
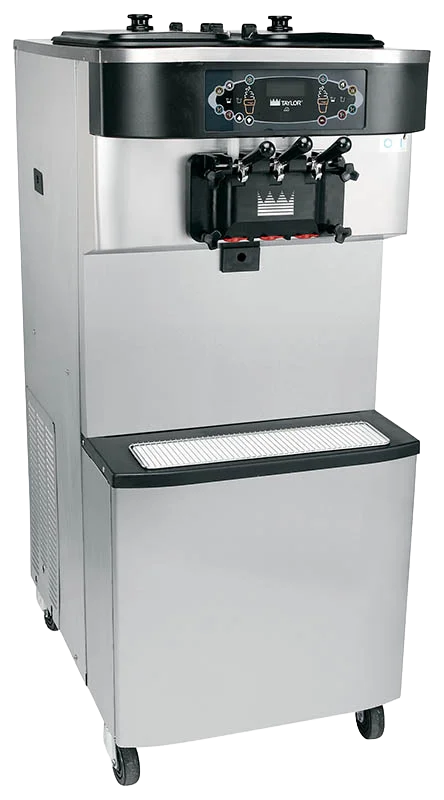
- Every C712 display fault code with fix steps
- BEATER OVERLOAD & HPCO reset procedures
- Temperature lockout thresholds (°F & °C)
- Operator-resettable vs. service-required faults
- Full 13-problem troubleshooting table from Manual 062179-M
- Official Taylor C712 parts replacement schedule
- OEM Taylor ice cream machine parts linked to our store
The Taylor C712 twin twist soft serve freezer runs a blank fluorescent display during normal operation — any text that appears means the machine needs attention. This guide translates every fault code the C712 can display into plain language, sourced directly from Taylor Operator's Manual 062179-M, with links to genuine OEM Taylor replacement parts that fix the most common issues. Taylor Upstate has been the only authorized Taylor distributor for Upstate New York and Northern Pennsylvania since 1981 — what's here reflects what we actually see fail in the field.
Taylor C712 Display Fault Codes Explained
The C712 UVC4 control board monitors beater motor load, compressor pressure, door status, and four thermistor probes (left/right hopper, left/right barrel). When a fault is detected, the code appears on the fluorescent display and is logged in Fault History. Here is every fault the C712 can display.
What it means: The beater motor has drawn excessive current and tripped its thermal overload protector. This is the single most common Taylor C712 fault code we receive calls about.
Common causes: Worn or missing front bearing and beater shoes (X50350) adding drag; damaged scraper blades (084350) catching the cylinder wall; product too thick (viscosity too cold); condenser dirty causing high ambient heat load on the motor.
Operator reset steps (Manual 062179-M):
- Place the power switch in the OFF position.
- Locate the reset button on the back panel of the machine.
- Press the reset button firmly. Never use a metal object — electrocution risk.
- Place the power switch back to ON.
- Press the Wash symbol and observe beater performance.
- If the beater runs correctly: press Wash to cancel, then press Auto to resume.
What it means: The refrigeration compressor's high-pressure cut-out (HPCO) safety switch has tripped. The compressor shut itself down to prevent damage from excessive head pressure.
Common causes: Dirty or blocked condenser fins restricting airflow; ambient temperature exceeds the operating range (normal: 70–75°F / 21–24°C; max: 104°F / 40°C); air clearance on machine sides is less than the required 3 inches; blower exhaust deflector not installed causing warm-air recirculation.
Operator reset steps (Manual 062179-M):
- Place the power switch in the OFF position.
- Wait 5 minutes for the machine to cool.
- Verify minimum 3 in. (76 mm) air clearance on all sides.
- Check condenser fins for dust and lint — clean with a soft brush if dirty.
- Place the power switch to ON and restart in Auto.
What it means: The control board detects the freezer door is missing. The C712 will not enter Auto mode without the door properly installed and sealed.
Fix: Install the door onto the freezer studs and tighten all handscrews equally in a crisscross pattern — long handscrews on top, short on bottom. Ensure the door gaskets (048926) seat fully in the grooves on the back of the door. If the door is installed and this fault persists, the gasket seating or door detection is the issue — contact your Taylor service technician.
What it means: The control board detected a fault in the hopper (mix) temperature probe. Without this probe the machine cannot monitor mix temperature for food-safety compliance.
Sub-codes that appear alongside this fault:
- SHRT — probe has shorted (resistance < 1 ohm)
- OPEN — probe circuit is open (resistance > 1 megohm)
- OVER — probe environment exceeded 200°F (93°C)
What it means: The freezing cylinder (barrel) thermistor probe has failed. Same SHRT / OPEN / OVER sub-codes apply as described above. This is a service-technician repair — the probe and/or wiring harness must be replaced. Call 800-678-2956.
What it means: The control board detected corrupt data during initialization, typically following a power surge or outage. The display reads: NVRAM FAULT / RESET TO DEFAULTS / PRESS SEL KEY.
Fix: Press the SEL key as prompted. The control resets to factory defaults. Re-enter any custom settings (clock, auto-start time, access code 8309). If this fault recurs repeatedly, the control board may need replacement — call your Taylor service technician. A quality surge protector on the circuit prevents recurrence.
What it means: Every time the C712 powers on, the control runs an initialization self-check (language, system data, config data, lockout data). After completion, the SAFETY TIMEOUT screen holds with the alarm on for 60 seconds, or until any key is pressed. This is normal behavior — not a fault. Press any key to dismiss and proceed.
Taylor C712 Temperature Fault Codes
These codes appear in the Fault History log (access via Manager's Menu, code 8309) when the C712 was in Auto or Standby and a mix temperature threshold was exceeded. All are food-safety critical — consult your local health code for required product disposition procedures.
| Fault Code | Threshold / Duration | Meaning & Required Action |
|---|---|---|
| (L/R) HPR>41F AFTER 4HR | >41°F for >4 hours | Hopper mix was above 41°F (5°C) for more than 4 hours. Consult health code — discard product per your authority. |
| (L/R) BRL>41F AFTER 4HR | >41°F for >4 hours | Freezing cylinder mix above 41°F for more than 4 hours. Drain, clean, sanitize and reprime before restarting. |
| (L/R) HPR>41F AFTER PF | >41°F post power failure | Hopper above 41°F for 4+ hours following a power failure. Discard product per local health code. |
| (L/R) BRL>41F AFTER PF | >41°F post power failure | Cylinder above 41°F post power failure. Full clean-and-prime required before service resumes. |
| (L/R) HPR>45F AFTER 1HR | >45°F for >1 hour | Hopper exceeded 45°F (7°C) for more than 1 hour. More urgent threshold — consult health code immediately. |
| (L/R) BRL>45F AFTER 1HR | >45°F for >1 hour | Cylinder exceeded 45°F for more than 1 hour. |
| (L/R) HPR>59F | >59°F at any point | Hopper mix exceeded 59°F (15°C) — critical limit. Discard product immediately per health code. |
| (L/R) BRL>59F | >59°F at any point | Cylinder mix exceeded 59°F — critical limit. Discard product immediately. |
| (L/R) COMP ON TOO LONG | Compressor run >11 min | Compressor ran continuously beyond 11 minutes. Typically a refrigeration issue or excessive ambient heat. Call service. |
C712 Fault History & Lockout History
Access via Manager's Menu — press the Cone symbol on the right side of the control panel, then enter code 8309. Use the arrow keys and SEL to navigate.
Fault History
Stores the last 100 fault events, each with date, time, and fault code. Page 1 is always the most recent fault. Your Taylor service technician will pull this log when diagnosing recurring issues — it is the single most useful diagnostic tool on the machine.
Lockout History
A separate log tracking hard locks, soft locks, successful brush-clean completions, and aborted heat cycles. Page 1 is always the most recent event. Up to 100 events stored.
Current Conditions
Live viscosity reading plus hopper and barrel temperatures for both sides. Use this to verify the machine is actually at serving temperature before drawing product after a long Standby period.
Taylor C712 Full Troubleshooting Guide
Every problem from Table 8-1 of Taylor Manual 062179-M with probable causes, remedies, and OEM Taylor ice cream machine parts linked where applicable.
| Problem | Probable Cause | Remedy | Level |
|---|---|---|---|
| 1. No product dispensed | Mix Out light on — low on mix | Add mix to hopper. Return to Auto. | DIY |
| Power switch OFF | Turn power switch to ON and select Auto. | DIY | |
| Machine not in Auto mode | Select Auto and allow machine to cycle off before drawing. | DIY | |
| BEATER OVERLOAD — beater motor on reset | Turn machine off. Press reset button. Restart in Auto. See Section 1 above. | DIY | |
| Feed tube or check ring (056524) not properly installed | Verify feed tube and rubber check ring are correctly installed per assembly procedure. | DIY | |
| Butterfat buildup in pump | Remove mix pump. Clean pump valve gasket (086097) and all components. Reinstall. | DIY | |
| Freeze-up in mix inlet hole / pump ball crank broken | — | SERVICE | |
| 2. Product too stiff / weak draw | Draw rate set too fast | Adjust draw rate to 5–7½ oz. (142–213 g) per 10 seconds using the adjustment screw on the draw handle (X56421-1). Loosen screw to decrease flow. | DIY |
| 3. Product too thick | Cylinder not primed correctly | Drain freezing cylinder and reprime fully. | DIY |
| Air/mix pump incorrectly assembled | Disassemble pump. Red piston O-ring and red valve cap O-ring must NOT be lubricated. Pump gasket (086097) must be dry. Reinstall per manual. | DIY | |
| Viscosity control set too cold | — | SERVICE | |
| Freeze-up in mix inlet hole | — | SERVICE | |
| 4. Mix in hopper too warm | Hopper cover not in position | Clean, sanitize, and place hopper cover in position. | DIY |
| Hopper temperature out of adjustment | — | SERVICE | |
| 5. Mix in hopper too cold | Hopper temperature out of adjustment | — | SERVICE |
| 6. Mix level probes not functioning | Milkstone buildup on sensing probes | Clean hoppers thoroughly using the hopper brush (023316). Scrub mix-level sensing probes directly. | DIY |
| 7. Product collecting on top of door | Top O-ring on draw valve (083693-SER) improperly lubricated or worn | Lubricate with Taylor Lube (047518) or replace the O-ring. | DIY |
| 8. Excessive mix leaking from bottom of door spout | Bottom O-ring on draw valve (083693-SER) improperly lubricated or worn | Lubricate with Taylor Lube (047518) or replace the O-ring. | DIY |
| 9. Excessive mix leakage into drip pan | Driveshaft seal (032560) improperly lubricated or worn | Lubricate or replace the driveshaft seal. | DIY |
| Driveshaft seal installed inside-out | Boot seal middle section must be convex (extending outward). If concave, turn seal inside out and reinstall. | DIY | |
| Inadequate lubrication of driveshaft | Apply even coat of Taylor Lube (047518) to shaft. Do NOT lubricate the hex end. | DIY | |
| Driveshaft and beater assembly working forward | — | SERVICE | |
| Worn rear shell bearing | — | SERVICE | |
| Gear box out of alignment | — | SERVICE | |
| 10. Driveshaft stuck in drive coupling | Mix and lubricant collected in drive coupling | Brush-clean the rear shell bearing area during every manual brush-clean using the black bristle brush (013071). | DIY |
| Rounded corners of driveshaft or drive coupling | — | SERVICE | |
| Gear box out of alignment | — | SERVICE | |
| 11. Freezing cylinder walls scored | Front bearing / beater shoes (X50350) missing or worn | Install or replace the front bearing and shoe kit. | DIY |
| Scraper blades (084350) damaged | Replace both blades — always replace as a pair. Blade hole must fit securely over the pin on the beater helix. | DIY | |
| Machine placed in Auto before sanitizer fully flushed | Always complete the priming flush before selecting Auto. | DIY | |
| Broken freezer door baffle rod | Replace freezer door. | SERVICE | |
| Broken beater pins | Replace beater assembly (X46231). | SERVICE | |
| Beater assembly bent | Replace beater assembly (X46231). | SERVICE | |
| Gear box out of alignment | — | SERVICE | |
| 12. Product makes popping sound when drawn | Draw rate set too fast | Adjust draw rate to 5–7½ oz. (142–213 g) per 10 seconds. | DIY |
| Pump assembled incorrectly | Red O-rings on piston and valve cap must NOT be lubricated. Pump gasket (086097) must be dry. | DIY | |
| Cylinder not primed correctly | Drain and reprime fully. | DIY | |
| 13. No control panel functions with power ON | Machine unplugged | Plug into wall receptacle. | DIY |
| Circuit breaker OFF or blown fuse | Turn breaker ON or replace fuse. Never exceed the fuse size on the machine data label. | DIY |
Taylor C712 Parts Replacement Schedule
Taylor's official OEM parts replacement schedule. Following this prevents the most common causes of scored cylinder walls, product leakage, and BEATER OVERLOAD faults — and is required to maintain your Taylor warranty. All parts below are genuine Taylor OEM stocked in our Troy and Marcellus, NY warehouses.
| Part | Part No. | Every 3 Mo. | Every 6 Mo. | Annually |
|---|---|---|---|---|
| Blade-Scraper-Plastic 8-1/2" | 084350 | ✓ | ||
| Seal-Drive Shaft (boot seal) | 032560 | ✓ | ||
| Gasket-Door HT 4"-Double | 048926 | ✓ | ||
| Kit A.-Beater-Front Shoes-Bearing | X50350 | ✓ | ||
| O-ring Draw Valve 7/8 OD SIL | 083693-SER | ✓ | ||
| O-ring Mix Feed Tube .643 OD | 018572-SER | ✓ | ||
| O-ring Pump Piston 2-1/8 OD Red — DO NOT LUBRICATE | 020051-SER | ✓ | ||
| O-ring Prime Plug .500 OD | 024278-SER | ✓ | ||
| Gasket-Simplified Pump Valve — DO NOT LUBRICATE | 086097 | ✓ | ||
| Ring-Check-Feed Tube | 056524 | ✓ | ||
| O-ring Pump Driveshaft 1/2 ID | 048632-SER | ✓ | ||
| Black Bristle Brush 1"×2" | 013071 | Inspect and replace as needed (min. annually) | ||
| Brush-Double End | 013072 | Inspect and replace as needed (min. annually) | ||
| Brush-Draw Valve | 013073 | Inspect and replace as needed (min. annually) | ||
Daily Cleaning Supplies
Taylor C712 Troubleshooting — Common Questions
Genuine Taylor C712 Parts — Same-Day Shipping
Taylor Upstate stocks the complete C712 OEM parts line from our Troy and Marcellus, NY warehouses. Tune-up kits, scraper blades, driveshaft seals, O-rings, draw valves, brushes, Taylor Lube, Stera-Sheen — all genuine Taylor ice cream machine parts, all in stock. Factory-trained C712 service across Upstate New York. Call 800-678-2956.
